A 5-step FRP grating install — prep supports, lay panels, clip, check bearing, finish with edge trim — delivers rated load and safety when done in order.
- Best for: contractors doing FRP deck installation on site
- Follow when: load rating and worker safety depend on correct bearing
- Key spec: verify support spacing, use stainless clips, follow 5-step sequence
Professional FRP Grating Installation
Proper installation ensures maximum performance and safety. Follow these 5 steps for professional results.
Step 1: Measure and Plan
Measure the installation area accurately. Account for panel dimensions and cutting waste. Plan support beam spacing to match grating span capabilities.
Step 2: Cut Panels to Size
FRP grating can be cut with standard tools: circular saw with carbide blade, jigsaw, or handsaw. Always wear safety glasses and dust mask. Seal cut edges with resin for corrosion protection.
Step 3: Prepare Support Structure
Ensure support beams are level and properly spaced. Minimum bearing surface: 40mm on each side. Clean support surfaces of debris.
Step 4: Install Grating Panels
Place panels on supports with proper orientation (bearing bars perpendicular to supports). Leave 3-5mm expansion gap between panels.
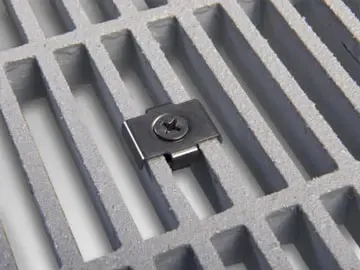
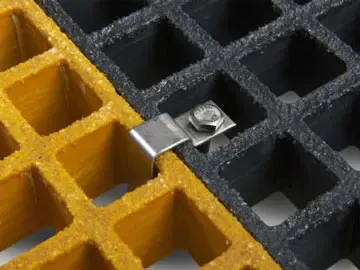
Step 5: Fasten with Clips
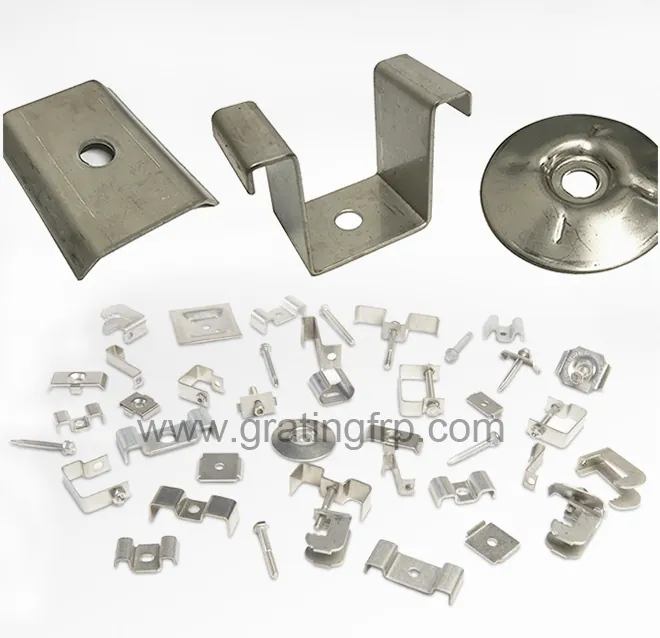
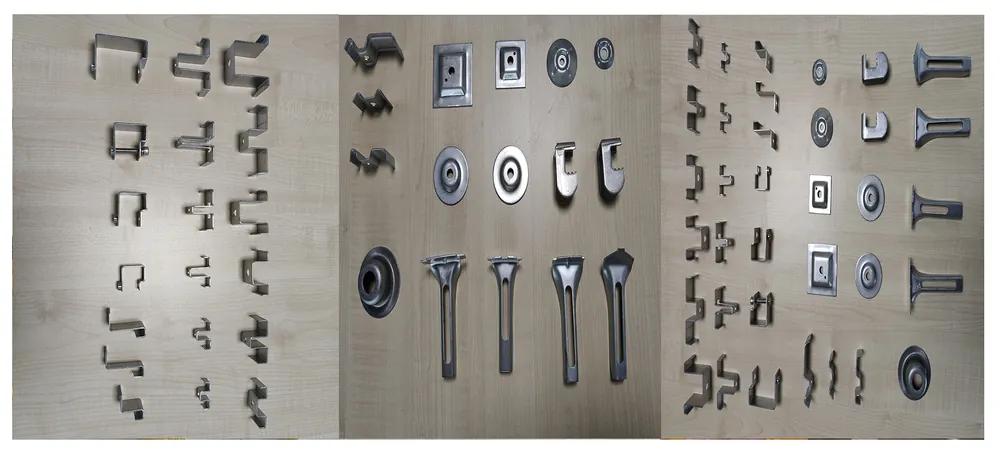
Use appropriate grating clips:
- M-Clip: Standard for most applications
- C-Clip: For edge mounting
- Z-Clip: For heavy-duty areas
- Stainless Steel: SS304 standard, SS316 for corrosive environments
Typically 4 clips per panel, 6-8 for heavy traffic or vibration areas. Torque: 15-20 Nm.
Tools, PPE and Dust Control for On-Site Cutting
Cutting FRP on site is quieter than cutting steel, but it is not dust-free. A diamond abrasive saw or a carbide-tipped blade produces glass-fibre and resin dust that irritates eyes, skin and lungs, so the crew should work with a half-face respirator, safety glasses and gloves before the first cut is made. Wet cutting is rarely practical on a walkway job, so a dust extractor on the saw and a daily wash-down of the work area are the realistic control. Do not use an angle grinder freehand on a knuckle; it gouges the bar and leaves an unsealed, frayed edge.
After every cut, the edge must be sealed. A brush coat of the supplier's recommended resin or gel coat within hours closes the wicking path that otherwise lets moisture or chemicals travel along the roving. Keep a small kit on the platform: seal pot, brush, and a pack of spare clips. The kit costs nothing compared with the cost of a panel that delaminates at the edge two seasons later.
- Half-face respirator, safety glasses and gloves before the first cut.
- Use a diamond abrasive saw, not a freehand angle grinder on a knuckle.
- Seal every cut edge within hours with a compatible resin or gel coat.
On-site cutting tools and what each is for
| Tool | Use | Note |
|---|---|---|
| Diamond abrasive saw | Straight field cuts and notch faces | Pair with dust extraction |
| Carbide-tipped hand saw | Small trims and finish cuts | Slower, cleaner on thin bars |
| Electric drill, HSS bit | Clip holes on site | Deburr and seal after drilling |
| Resin brush kit | Edge sealing after every cut | Keep on the platform, not in the truck |
Common Installation Mistakes and How to Avoid Them
Most call-backs on a grating install are not material failures; they are installation habits that shortcut the drawing. The four that recur are: panels laid across too few supports, clip spacing stretched to save hardware, tight fits hammered into place, and cut edges left unsealed. Each one looks finished on day one and shows up as a walking panel, a frayed edge or a delamination within the first year. The fix is to treat the installation drawing as the contract, not as a suggestion.
A panel that is not supported on all four edges will flex and fatigue at the overhang, and a clip that is over-tightened crushes the bar and creates a stress point. Leave a small clearance at the ends to absorb thermal movement, and torque clips by feel rather than by impact wrench. Walk the finished deck with a hand on each panel before sign-off; a panel that rocks underfoot is a panel that will not last the winter.
- Support panels on all four edges; overhangs fatigue quickly.
- Follow the drawing clip pitch; do not stretch it.
- Leave end clearance for thermal movement; do not hammer tight fits home.
Common install mistakes and their on-site fix
| Mistake | Symptom later | Fix on site |
|---|---|---|
| Too few support beams | Panel flexes, knuckle cracks | Add intermediate support |
| Stretched clip spacing | Panel walks underfoot | Add clips at drawing pitch |
| Tight fit hammered in | Bar crushed, edge stressed | Pull out, re-cut with clearance |
| Unsealed cut edge | Delamination after seasons | Strip back, seal, monitor |
Frequently Asked Questions
FRP (Fiberglass Reinforced Plastic) grating is a molded or pultruded fiberglass composite grid used for corrosion-resistant walkways, platforms and floorings. It combines glass fiber reinforcement with thermoset resin (polyester, vinyl ester, epoxy) for superior strength-to-weight ratio, zero rust and 20+ year service life.
Avoid freehand angle grinding on a knuckle; it gouges the bar and leaves a frayed, unsealed edge. Use a diamond abrasive saw with dust extraction for straight cuts and notches, and a carbide hand saw for small trims. Wear a half-face respirator, glasses and gloves, because glass-fibre and resin dust irritates eyes, skin and lungs.
Yes. Cutting exposes the roving, and moisture or chemicals can wick along the fibre-resin interface and cause delamination from inside. Brush on a compatible resin or gel coat within hours of the cut and let it cure before the panel sees service. Keep a small sealing kit on the platform, not in the truck.
By feel, not by impact wrench. Over-tightening crushes the bar and creates a stress point that cracks later. Follow the drawing clip pitch, leave a small end clearance for thermal movement, and walk the finished deck before sign-off; a panel that rocks underfoot is not ready for handover.
Usually stretched clip spacing or too few support beams. A panel held at the wrong pitch flexes under foot traffic and gradually moves, fretting its own edges against the support. The fix is to add clips at the supplier drawing pitch and, if the overhang is the problem, add an intermediate support beam rather than forcing the panel to span further.
No. FRP cannot be coaxed into place the way steel can, and hammering crushes the bar and stresses the edge. If the opening is too tight, pull the panel out, re-cut with a small clearance, and refit. The clearance also absorbs thermal movement between seasons, which a tight fit cannot do.